
Welcome to Part 14 of The Wild Beyond the Witchlight: Reimagined, an expansion and alternative take on the The Wild Beyond the Witchlight campaign. Wanted to make sure I got this out to you all before the end of the year as a holiday gift and capstone on The Fields of Spring so hope you enjoy!
Please check out the previous entries in the series before diving in here.
- Introduction and Table of Contents
- Part 0: Adventure Outline
- Part I: Preparation
- Part II: Lost Things
- Part III: Interlude
- Part IVA: The Witchlight Carnival (Section A)
- Part IVB: The Witchlight Carnival (Section B)
- Part V: Murkendraw (Welcome to the Swamp)
- Part VI: Murkendraw (Locations of the Swamp)
- Part VII: Murkendraw (Downfall and Bavlorna)
- Part VIII: The Fields of Spring (aka Thither)
- Part IX: The Fields of Spring (Vale Crossing – Section A)
- Part X: The Fields of Spring (Vale Crossing – Section B)
- Part XI: The Fields of Spring (The Shroudwood)
- Part XII: The Fields of Spring (Loomlurch)
- Part XIII: The Fields of Spring (The Golden Fields)
If you want to be notified every time I release a new entry in this series, feel free to follow me on reddit and / or sign up for my e-mail newsletter!
Introduction

The Green Keep was once the seat of power of Oberon, the Green Lord. When he disappeared 10 years ago during the War of Seasons, the goblin-folk under the rule of Great Gark seized the keep and re-purposed it into their own stronghold. While the goblins have more or less left the people of the domain of Spring alone, they have gotten bolder as of late, setting up a logging camp in The Shroudwood.
Gark is secretly planning to conquer the entire land of Spring for himself. His preparations include a two-pronged plan of using the magical wood of The Shroudwood to craft powerful weapons as well as Skabatha’s tin soldiers to supplement his army. As a result, the goblins of the Green Keep are not very friendly to outsiders unless there is something in it for them.
It should be noted that the goblins of the Feywild are more dangerous than those found in the Material Plan, and adventurers should be careful not to underestimate them if they go in guns (fireballs?) blazing. The Green Keep is most likely the most dangerous area in The Fields of Spring and I would suggest gently pushing your players away until they are at least Level 5 (unless it just to seek a peaceful audience with Gark).
If the party breaks into the keep, most of the inhabitants will not hesitate to engage the players in combat. If things turn south in a fight, they may also run to seek help given the amount of reinforcements inside the keep they can bring to bear. That said, the keep is also home to many hobs that the goblins employ as essentially slave labor (see the Loomlurch entry for more details) who are more likely to hide or even potentially help the party.
While not explicitly stated below, you can assume goblins and hobs wander the halls of the keep at all hours. Feel free to send patrols your party’s way to keep them on their toes. To play this up you may choose to have your players make Stealth checks when taking actions like lockpicking doors to see if they alert passing guards. The keep is also home to a lot of furniture and natural barriers, keep in mind things like half-cover for the sake of your party’s safety.
What the Goblins Know
If the party listens in on conversations or interrogates inhabitants of the keep they can learn some of the following information (as well as general directions around the keep):
- A big human man was locked up about a week ago and is being held in the prison
- This is Strongheart from Valor’s Call
- Tidbits about Great Gark’s “big plans” to take over the Fields of Spring. These include:
- Allying with the hag in the woods for her tin soldiers
- Logging the Shroudwood to create magical weapons
- Experiments in the keep to develop monstrous creatures to supplement the goblin army
- Three strange visitors arrived today and are meeting with Great Gark
- These are Kelek, Zarak, and Warduke from the League of Malevolence though the goblins would only know what they look like
- The nilbog, Puck, is continuing to cause trouble around the keep (see the Chapel for more details)
The Green Keep
Arriving at the Keep
When the players first arrive at the Green Keep they will find themselves at the keep’s gatehouse, which then leads in to the outer courtyard. I recommend using the Castle Courtyard map by AfternoonMaps to represent this outer area.
I’ve updated the Goblin Tokens file to include goblin tokens from the Green Keep if you are using a VTT like Roll20.
The Gatehouse
You approach the main gatehouse of an immense keep. The gate is twenty feet tall and fashioned out of thick steel. It is sealed shut, presumably barred from the inside. Two goblins stand guard atop the rampart battlements and peer down as you approach. A number of human sized skulls are impaled on pikes just outside and rot of death.
- The two goblin sentries (see Part 11 for stat blocks) atop the walls have half cover against attacks from outside The Green Keep. If the players attempt to force their way in they will fire down indiscriminately
- Visitors are typically not welcome. The goblins who live here have little fondness for non-goblins. However if players are very convincing (or bring an offering) they may be able to get a meeting with Great Gark the Goblin King in which case the players would be blindfolded and directly escorted to the Throne Room on the 2nd floor
- The gate is impassable from the outside without the use of something like a battering ram. If the players seek to sneak in it will require a successful DC 14 Athletics check to scale the wall, and a successful Stealth check contested by the goblin’s passive perception to do so without being noticed
- Alternative options to enter would include things like disguising oneself as goblins. This will be considerably easier if they use the password “Glory to Gark” which can be found at the Logging Camp (see Part 11)
Outer Courtyard
The gatehouse gives away to an open courtyard. In the center a stone statue atop an empty foundation depicts a man dressed in green regal attire. A small set of stairs at the far end of the courtyard lead up to a pair of large open doors that lead directly into the Green Keep itself.
The courtyard is heavily defended with the following (see Part 11 for stat blocks):
- A single goblin shredder
- One goblin pyromaniac in the courtyard
- Four goblin sentries manning the walls and two additional in the courtyard itself
- A goblin overseer who oversees the courtyard forces
Milling within the courtyard are also a number of hobs (see Part 12 for details), approximately six at any given time.
- If the players examine the statue and have seen the statue of Oberon in Vale Crossing they will immediately recognize it as almost identical
- The doors to the Green Keep themselves are open, allowing passage in (to the first floor) and out of the Green Keep
- If the party has snuck past the Gatehouse, they can also attempt to sneak through the courtyard by avoiding the perception of the goblins here
First Floor
For the Green Keep itself I recommend using the Iron Keep map by Morvold Press. The keep has two floors with the first map representing the bottom floor where the party enters from the Outer Courtyard and the second map representing the second floor.

L1. Entrance
Given the party is entering via the Outer Courtyard I am disregarding the drawbridge (if you are using Roll20 or another VTT just block it from vision) and considering the entrance to start as depicted here.
The paved stone entryway into the keep is lit by three magical glowbulbs lining each wall that mimic flickering candlelight. Slit window shutters are nestled between the glowbulbs, seemingly a venue for firing arrows into invaders, though they currently seem unmanned. A wooden gate at the far side is fully raised, giving a glimpse into the keep’s main courtyard.
Given the defensive nature of the Gatehouse and Outer Courtyard, the goblins are confident they have the keep well defended from outsiders and thus have left the main entrance here more or less empty.
L2. Barracks
This room is furnished with three simple but sturdy beds lined in a row, each with a locked wooden chest at their feet, while a plain wooden dining table fills the majority of the space. Attached to the main room, is a smaller more well-furnished living area seemingly for someone of more importance. The entire space reeks like a barnhouse.
A successful DC 10 Investigation check will make clear this is a small barracks being used by the goblins as living quarters, while the larger room is home to an officer. During the day the rooms are empty, and at night 1d3 goblin sentries and 1 goblin overseer will be found sleeping here.
The chests can be unlocked with a successful DC 12 Dexterity check using thieves’ tools. Each holds 1d8 gp and 1d20 sp as well as 1d3 sets of goblin-sized traveling clothes. The chest in the officer’s room also has either a potion of healing (left side room) or a Library Pass (right side room). The pass is the size of a playing card and simply says “Library Pass” written in Sylvan, but gives off an aura of Abjuration magic if inspected with a successful DC 12 Arcana check (it is used for the Library on the 2nd floor).
L3. Courtyard
The Green Keep’s main courtyard is an impressive open lawn of rich emerald grass lined with stone pathways winding into different parts of the structure. As you get a better look at the keep as a whole, it’s clear there was deep artistry in its construction, but hasn’t been maintained as well as of late.
As with the outer courtyard, the party will see about six hobs going about their business. A patrol group of 2 goblin knights (see below) and 1 goblin overseer will constantly make their rounds through the courtyard and will attack any intruders, though a more resourceful party may decide to sneak by or wait for the patrol to move out of sight.
Within the courtyard are number of additional features:
- Fresh water wells where the party can refill waterskins if desired
- Hay bales that can serve as cover from sight
- A wagon in the southwest holding supplies that include 50-feet of hempen rope, 4 flasks of oil, 2 hooded lanterns, 10 rations, and miscellaneous yard tools

L4. Guest Rooms
These rooms serve as quarters for guests of the keep but have been co-opted by goblins and hobs as permanent living spaces. Each comes with a bed and simple furniture containing clothes and worthless personal effects.
During the day the rooms are empty, and at night either a goblin sentry or hob can be found sleeping in each bed.
L5. Stables
These stables are warm but reek of animal waste and hay. The stalls all house simple workhorses and cows, except for one. A fierce beast, an owlbear, is curled up inside asleep next to a large harness in the stall at the stable’s far end.
The owlbear (Basic Rules) is Juniper, the creature the party befriended during the prologue of the adventure, a fact that can discovered by the engraving of her name in the harness boss. Juniper can be snuck past with a successful DC 14 Stealth check, but otherwise soon awakens once the party enters the stables. As mentioned earlier in the series, we have discarded the Owlbear and Chariot event and placed Juniper here instead.

Juniper will initially attempt to attack and eat the characters. As long as the party was friendly to the owlbear during the prologue, she can easily be calmed with DC 10 Animal Handling check rolled with advantage as she remembers her old friends. If the players don’t seem to remember her, feel free to call for a History check to give them a reminder. Once calmed, it will be clear the owlbear is being used as a beast of burden by the goblins and not well treated.
There are a number of options as to how the party could choose to deal with Juniper to rescue her:
- As per the adventure, Juniper can be convinced to be used as a steed for the party but is too large to fit in most doorways of the Green Keep. She will also still require the 8 pounds of meat per day (but if not fed will instead flee off on her own instead of attack).
- The Getaway Gang would be happy to invite in her as a part of their group to live with Little Oak
- If taken to Vale Crossing, both the sheriff and Elise Brightfield would be happy to take the owlbear in
- She can be freed to live her own life in The Shroudwood with others of her ilk
Whatever path the players choose, if she is successfully calmed she can be convinced to stay and wait while the party goes about their business in the keep.
L6. Parlor
This parlor is kept warm by a blazing hearth encircled by three plush cozy chairs. A bronze chandelier hangs down from the ceiling perched above two large circular tables seemingly meant for socializing.
A particularly nervous hob named Tremble can be found here cleaning the room. He can be calmed with a successful DC 12 Persuasion check but otherwise may scream for help, alerting any nearby goblins. If calmed, Tremble can share knowledge from the “What the Goblins Know” section above as well as provide directions around the keep. He will be too frightened to actually accompany the party though.
L7. Constable’s Quarters
This room appears to serve multiple purposes containing simple living quarters, an office of sorts kept in poor order, and a padlocked metal grate inset into the floor that appears to act as a prison.
This area is home to Constable Gazgak, a goblin overseer who oversees the keep’s prisoners. Gazgak brings prisoners down here for interrogations and questioning, but otherwise they are typically held in the prison on the 2nd floor directly above his quarters. He always keeps the Green Keep Prison Key on his person which can unlock the trapdoor in this room as well as the prison cells on the 2nd floor.
Typically the constable is not a particularly interesting person, having a cruel mind that makes him well-suited for his job. However, about a week ago he came into possession of Strongheart from Valor’s Call after a patrol group happened upon the adventurer. Gazgak’s office contains all of Strongheart’s belongings including his plate armor, shield, and the longsword Steel. The sword is tucked into drawer and wrapped in a blanket to keep it muffled, but if freed the sentient blade will happily share with the party Strongheart’s background and plight.
An alternative option is to have Chucklehead from Loomlurch act as the constable if that character made an impression on the party.
Trapdoor and Cell. A 3-foot-square, padlocked iron grate covers a 5-foot-deep, 5-foot-wide cell built into the floor. As an action, a character can use thieves’ tools to try to pick the lock, doing so with a successful DC 16 Dexterity check. As an action, a character can try to pull open the trapdoor without removing the padlock, doing so with a successful DC 20 Strength (Athletics) check. The cell is empty at the moment.
L8. Servants Kitchen
What seems to have once been a smaller kitchen intended for feeding servants of the keep, has been repurposed into a makeshift gastro-alchemical lab. Mixed between pots, pans, and cutlery are stirring rods, bubbling beakers, and other foreign implements. Most striking though is a gelatinous monstrosity filling most of the room that turns in your direction.
The creature is a gelatinous bear, an experiment by the goblins to create monsters to fight on their side for their eventual goal of conquering all of the Fields of Spring. You may choose to have it wander out into the courtyard at some point if appropriate.

A search of the room will turn up the dead body of a goblin, clearly torn apart by the gelatinous bear, as well as a set of alchemist’s supplies, a vial of toxin, and a vial of antitoxin. On the body, the players will find a piece of parchment laying out experiment notes that are too bloodied to read, but clearly related to the gelatinous bear, as well as a potion of greater healing.

L9. Chapel
The room is dominated by a stone altar that has been smashed and toppled. Markings on the ground indicate where an offering bowl likely once stood, but has seemingly been stolen. The walls and ceiling are filled with painted graffiti scrawled in Goblin and there is still a faint spell of incense hanging in the air.
When the players arrive there is a 50% chance that Puck, Greater Nilbog is present and is using her scepter to drag paint across the walls. If caught by the party she will immediately attempt to escape to the Courtyard to seek help and will turn to fight if the odds shift in her favor. As a nilbog, Puck has an honored position among the goblins of the keep in that they will give her a wide berth. Puck takes advantage of this to play pranks and generally cause trouble.
If the party is able to successfully subdue the nilbog, she will offer to help the party in exchange for her life.
A DC 10 Religion check will reveal that the chapel is non-denominational in nature and was likely intended for any followers of Oberon to use regardless of their faith. A 15 or higher will also reveal a lingering pain of sorts seeking healing.
The altar can be repaired through a few uses of the mending cantrip or appropriate tools, while the graffiti can be cleared with the prestidigitation cantrip or other means. Any characters who contribute to repairing the chapel receive 5 temporary hit points as they feel their body filled with grateful spiritual energy.

L10. Storeroom
This room is dominated by five enormous grain silos that reach up to almost the ceiling. The southern wall is filled with sacks, while a half-loaded wagon is positioned to transport the goods across the keep.
L11. Dining Room
This cramped mess hall exudes an overwhelming scent of musty wood. Long worn tables and benches are tightly packed together and leave little room for maneuvering.
Three goblin sentries are gathered around a table playing a game of dice, while and one hob servant tends to their needs. A pool of gambled coins is strewn on the table and contains 4d8 gp and 2d20 sp.
L12. Kitchen Staff Quarters
As you push open the heavy oak door, you find yourself in a cozy, round bedroom that seems to be intended for the keep’s cooking staff. From the heat inside, the room seems to be directly adjacent to the kitchen. A thick, woolen rug covers the floor, providing warmth and insulation from the cold stone beneath.
The room contains two mess kits and a set of cook’s utensils.
L13. Main Kitchen
As you enter the kitchen, the aroma of baking bread fills the air. The room is spacious and well-lit, with six prep stations spread throughout the space, each equipped with a cutting board and utensils. In the back corner of the room stands a massive stove, ablaze with cooking fires, and an attached storeroom is stocked with all manner of ingredients. The kitchen is a bustling hub of activity, with hobs rushing from station to station, chopping vegetables, stirring pots, and tending to the sizzling meats.
2d4 hobs can be found here at any given time prepping and cooking meals for the goblins of the Green Keep.
L14. Kitchen Storeroom
This storeroom is small and cramped, but is packed to the brim nonetheless. Sacks of flour and sugar line the walls, while barrels of pickled vegetables and cured meats sit in the corners. Jars of jams and preserves jostle for space on the shelves, and bunches of fresh herbs hang lazily from the ceiling.
The room contains twenty days’ worth of rations and five flasks of cooking oil.
L15. Stairway
A set of stone stairways lead up to the second floor. Carved into the railings are intricate depictions of a wide variety of fauna native to the Feywild that seem to almost come alive.
L16. Feast Hall
The smell of roasted meat wafts from a large, dimly-lit dining. The room is filled with long wooden tables and benches, seated at which are goblins of all shapes and sizes, gnashing their teeth and laughing as they shove food into their mouths. A group of pale pink hobs are busily tending to feasting goblins. It seems that the creatures have had no qualms about making themselves at home.
A pair of hobs can be seen acting as bussers and makeshift waiters for the one goblin pyromaniac and 2d6 feasting goblin knights. A goblin overseer looks over the proceedings. The food does not look particularly appetizing with examples of dishes including:
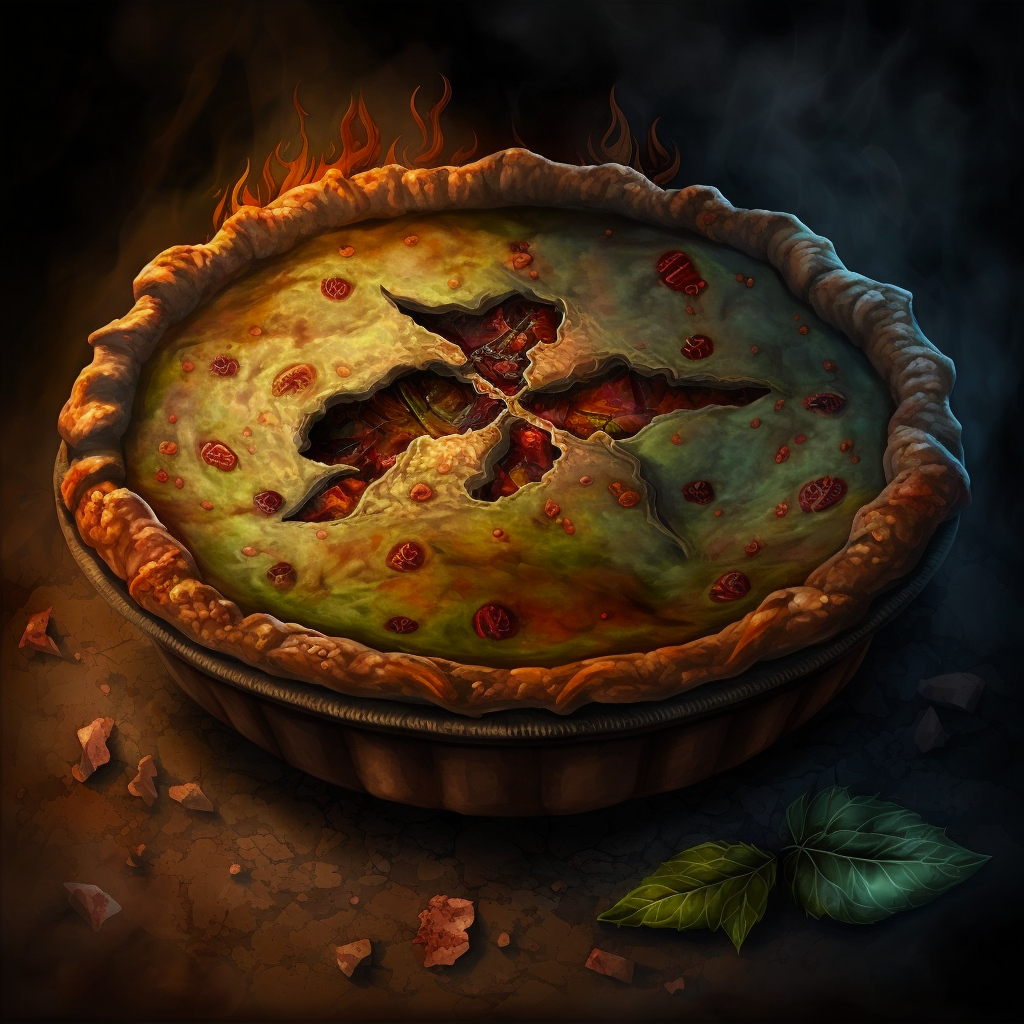
- Mystery Meat Pies: Savory pies filled with meat of unknown origin and seasoned with herbs and spices sourced from the swamps of Murkendraw
- Red-Rung Tongue: Pickled blink dog tongues served as a spicy snack
- Goblin Grog: A fermented ale made from potent mushrooms
L17. Workshop
As you enter this room, the heat and glow from a massive blistering forge washes over you. It appears to be a workshop of sorts with metalworking tools, glassware, and materials scattered everywhere. In the center of the room, an aproned goblin is bent over the forge, working tirelessly to shape a piece of red-hot metal with a pair of forceps.
The goblin working the forge is a goblin pyromaniac named Fizzlespark and holds a forceps worth 15 gp. Fizzlespark is an impulsive and reckless fellow, and constantly seeking out new and creative ways to craft things with fire. He is also deeply superstitious, believing that fire has the power to ward off evil spirits and that getting wet would have the opposite effect. As a result it’s been quite some time since the goblin has enjoyed a bath.
If attacked, Fizzlespark can remotely activate the furnace as a bonus action, choosing one of the following effects when doing so:
- Blinding light explodes out into the room, forcing each creature in the room other than Fizzlespark to make a DC 15 Constitution saving throw or become blinded for 1 minute. A creature can repeat the saving throw at the end of each of its turns, ending the effect on itself on a success.
- Fire erupts outward. Every creature in the chamber must succeed on a DC 15 Dexterity saving throw or take 10 (2d10) bludgeoning damage plus 12 (3d8) fire damage. The damaged is halved on a success.
A search of the workshop yields a set of smith’s tools and a +1 shield.
Second Floor

L1. Courtyard
From the second floor, characters can look down on the courtyard below through any windows or other openings.
L2. Ballistae
A series of shutters dot the stone wall and provide a defensive position from which guards could fire down on the entryway below. Two wooden ballistae, each mounted on a sturdy platform, also sit unmanned, and to the side there is a set of tables where guards could presumably rest when not on duty.
For details on the ballistae see the “Siege Equipment” section of the Dungeon Master’s Guide.
L3. Barracks
The room is cramped, with a five small beds lining the wall with a small number of simple tables and chairs for accompaniment. The air is thick with the smell of sweat and personal items like clothes, weapons, and trinkets are scattered about.
During the day the rooms are empty, and at night 1d3 goblin sentries and 1 goblin overseer will be found sleeping here.
A search of the room will find 3d8 gp, 2d20 sp, 1d6 sets of goblin-sized traveling clothes, and a library pass. The pass is the size of a playing card and simply says “Library Pass” written in Sylvan, but gives off an aura of Abjuration magic if inspected with a successful DC 12 Arcana check (it is used for the Library on the 2nd floor).
L4. Sitting Area
This open air sitting area surrounds crates of common tools and supplies required by the staff of the keep.
L5. War Room
A sense of purpose and gravity that fills the air in this room. A round table, hewn from the same dark, ancient wood as the keep itself, dominates the space itself. Around it, high-backed chairs stand at attention, as if waiting for the councilors who will soon gather to discuss matters of great importance. The walls are adorned with maps and charts, seemingly of different areas of the Fields of Spring, each marked with intricate symbols and annotations.
A DC 14 Intelligence check will reveal that the goblins of the keep are clearly laying out battle plans to attack Vale Crossing and seize the rest of The Fields of Spring. An 18 or higher also reveals that they are looking to use a combined army of goblins, tin soldiers, and monstrous gastro-alchemical experiments to accomplish this.
One of the maps is of the Green Keep itself. You could choose to give your players a map handout if you choose or simply describe the layout and the different rooms they see.
L6. Stablemaster’s Quarters
This room is modest and unassuming with low ceilings and rough stone walls. A small bed sits against one wall, surrounded by a few basic furnishings. You quickly notice that the room is above the stables, and you can hear the soft whinnying of the horses and the rustling of hay.
Inside this room the party can find a feeding plan for an owlbear. This is for Juniper who is currently locked in the stables on the first floor.
L7. Prison
The doorway leading inside is made of a thick wood and is locked. It can be opened with the Green Keep Prison Key, Green Keep Master Key, or a successful DC 14 Dexterity check using thieves’ tools. If a character fails an attempt to lockpick the door they may draw unwanted attention.
This room is lit by the flickering fire of a pit in the center against which a number of torture implements are leaning on. Six prison cells with barred doors encircle the room, each with a single damp straw bed.
When the players enter there are two goblin knights standing guard. There is a 50% chance that they have fallen asleep on duty.
Starting clockwise from the entry, the cells contain the following:
- Cell 1: A single humanoid skeleton is manacled against the wall. If the players unlock and investigate the cell they can find a ruby pendant worth 150 gp nestled in a crack in the cell wall with a successful DC 13 Investigation check.
- Cell 2: Empty
- Cell 3: Strongheart (see below)
- Cell 4: Empty
- Cell 5: Empty
- Cell 6: A goblin named Kreech Mudfoot. Kreech is not a fan of the path Great Gark is taking the goblins and would prefer co-existence with the other denizens of the Fields of Spring. As he’s wary of a trap by his captors he introduces himself to the party as “Harry” – not realizing it’s a terrible disguise.
Each of the cell doors has a single locked door handle containing a shock trap (see below). Each door handle has an AC 17, 15 hit points, and immunity to poison and psychic damage. Each of the cell door locks can be picked with a successful DC 20 Dexterity check using thieves’ tools as long as the trap isn’t still active.
Shock Trap
The trap can be spotted with a successful DC 12 Arcana check, and a 16 or higher reveals how it operates.
Touching the door handle directly with something metal (such as thieves tools) activates the trap with the exception of the Green Keep Prison Key or Green Keep Master Key. The handle will immediately shock the creature that triggered it dealing 12 (3d8) lightning damage and destroying any thieves tools in direct contact with the handle. The trap remains after being triggered.
Ways to bypass the trap include:
- Using the Green Keep Prison or Master Key
- Casting dispel magic on the door handle
- Destroying the handle without using a metal object or directly touching the handle

Strongheart
Strongheart has 1 hp and one level of exhaustion. He also has none of his equipment on him and is wearing simple and dirty traveler’s clothes. His equipment is in Gazgak’s office but he doesn’t know this.
As long as Strongheart believes the party is here to help he will share the following information:
- All of the information provided by Elkhorn at Underfoot in Vale Crossing
- The prison is run by Constable Gazgak who occasionally stops by. He always seem to head downstairs afterwards
- There are typically two guards that keep watch here but they don’t seem to have keys like the constable
- Unfortunately he was unconscious when he was brought in and therefore doesn’t know much else about the keep
If freed, Strongheart will help the players navigate The Green Keep. Once their work is finished though he will want to re-unite with Elkhorn and then go out in search of the rest of the lost members of Valor’s Call.
L8. Royal Quarters
Two goblin knights are always on duty outside of the Royal Quarters and will attack anyone who attempts to intrude.
The double doors to the Royal Quarters are each set with metal door handles resembling the face of treants. These handles are locked and trapped. The trap can be spotted with a successful DC 14 Investigation check, and a 16 or higher will disarm it outright. If the trap is disarmed, the doors can be opened with a successful DC 14 Dexterity check using thieves’ tools.
If a player attempts to use the door without disarming the trap, a poisoned needle extends out from the keyhole striking at the player. They must make a DC 16 Dexterity saving throw or take 2d4 piercing damage, 2d10 poison damage, and become poisoned for 1 hour.
A large desk made of dark, polished wood sits at the center of the room and seems to radiate a sense of authority and power. The walls are adorned with a grand portrait of Oberon the Green Lord, while a set of double-doors lead further inside.
On top of the desk is a small metal lockbox with a single keyhole. A note is attached to the outside that reads “Don’t open!” scrawled in childlike handwriting.
- The lockbock can be opened harmlessly with the Green Keep Master Key, but otherwise transforms into a mimic if there is any attempt to open it
- If opened with the key, the inside is empty except for a small piece of parchment that reads “Haha!”
- If the mimic is defeated, it shrinks back down into the form of the lockbox – now broken open – and the note slips out
If the players open the desk itself they will find it is filled with crumpled up and unsent letters. They all read as if different drafts of the letter below.
My Dearest Titania,
I hope this letter finds you in the bloom of health and happiness. It is with a heart full of love and adoration that I pen these words to you.
I have been enchanted by your beauty and grace, and I am powerless to resist the allure of your charms. My love for you burns bright as the spring sun, and I cannot believe that it took me so long to see it. You have bewitched my heart and captured my soul, and I am yours forever.
Forgive me for any past ignorance, my love. From this moment on, I am yours to command and yours alone. I will come to you as soon as I am able, my sweet Queen Titania. Until then, know that my love for you grows stronger with each passing day and that you are constantly in my thoughts.
Yours Devotedly,
Oberon
L9. Oberon’s Bedroom
You are immediately struck by the grandeur of this bedroom which could only belong to Oberon himself. The room itself is spacious, with high ceilings and elaborate tapestries of nature adorning the walls, as well as tall windows that let in the dappled light of the woods outside. The bed carved from oak sits on a raised platform, its lush blankets and pillows inviting you to lie down for a short rest. A small hearth also sits in the corner, flickering gently with the glow of a warm fire, next to a small sitting area.
In the evening Great Gark can be found sleeping here. Otherwise he is at the Throne Room.
With a successful DC 16 Investigation check a character can find a hidden cache stashed under a loose floorboard with Sam Bewick’s Leyfi Runestone (see Parts 8 and 9 for details) as well as Gark’s personal stash of coins equaling 150 gp. Alternatively you may choose to have the runestone be on Great Gark’s person in the throne room.
L10. Emerald Guard Barracks
As you enter these barracks, the smell of steel greets you. Rows of messy bunk beds line the walls with battered shields and weapons strewn across them. In the center of this room, a long wooden table is covered in plates and mugs.
The Emerald Guard were Oberon’s elite fighting force of spring eladrin when he ruled from the Green Keep. Since then it has been taken over by the higher echelon’s of Gark’s forces. During the day the rooms are empty, and at night 1d3 goblin knights and 1 goblin overseer will be found sleeping here.
The overseer has a Green Keep Master Key on his person which will open any lock found within the Green Keep.
L11. Library
The soft glow of a fireplace against the far wall illuminates the rows of bookshelves that line the walls of this library. Off to the side stands a large round reading table surrounded by wood chairs with a large statue of an automaton looming over it.
Nestled in the west corner you notice a small office with a desk and a few shelves filled with more books and papers. You can see a quill and inkpot on the desk, as if the librarian has just stepped out for a moment.
An investigation of the library will uncover a spell scroll of comprehend languages, a spell scroll of plant growth, a spell scroll of guardian of nature, and a tome of Feywild lore bound in leather and written in Sylvan (worth 150 gp). If you have a wizard in your party this would be a good place for a spellbook as well.
If a player takes anything outside of the library and does not have a library pass on them, the statue comes to life and attacks the party (a clockwork stone defender – Monsters of Multiverse).
L12. Study
This chamber contains two sets of desks with matching chairs, and small conversation table by a blazing hearth. Connected to the study are two plain bedchambers.
L13. Royal Guest Quarters
These quarters contain a series of opulent rooms connected by different sized corridors, and were likely used to house royal guests while they were staying in the keep. There are several sitting areas between the rooms, each with plush rugs and comfortable chairs arranged around low tables.
A search of the rooms will uncover:
- 1d4 feywild trinkets
- A wood carving of a bear worth 10 gp
- A bottle of fine wine worth 25 gp
- A set of emerald earrings worth 100 gp
- A single potion of healing
- A bar of deep elm soap (see below)
Deep Elm Soap. This soap swirls with green hues and the shine of eladrin magic. Washing with this soap grants you immunity to disease and the poisoned condition for one day. This soap has 1d3 uses remaining.
L14. Stairway
A set of stone stairways lead down to the first floor.
L15. Throne Room
Instead of having a scene here depicted on the large map, I took players to the throne room itself using the Elven Throne Room map by DnDavid.
If the players are escorted directly to the throne room, begin by reading the following:
Goblin knights escort you through the depths of the keep, and up a flight of stairs. At that point they remove your blindfolds and you find yourselves in the throne room where the goblin king awaits.
If the players are attempting to break into the throne room, the doors are locked but can be opened with a successful DC 14 Dexterity check using thieves’ tools.
Once inside read:
Large and ancient twisting branches arc their way through the throne room making it almost seem to thrum with life. The furnishings here glimmer with a quality unlike that of anything else within the keep, and especially the raised throne upon which the goblin king Great Gark lounges upon with a wide smirk. In stark contrast, a number of bones are strewn across the sides of the hall including a few obvious humanoid skulls.
- When the players arrive, Gark is flanked by his two most trusted advisors – General Brix (a goblin overseer) and the Grand Wiz Redtooth (a hobgoblin devastator – Volo’s Guide to Monsters). They are clearly in the middle of an audience with three members of the League of Malevolence – Kelek, Zarak, and Warduke. Kelek is doing all of the talking while the other two do their best to look intimidating.
- If the players wait for a moment, they can overhear the conversation. Kelek is seemingly attempting to bargain for a prisoner the goblins have – someone named Strongheart (which the players may recognize if they met Elkhorn in Vale Crossing). Gark seems reticent as he hadn’t realized the prisoner was someone of high value.
- Technically the players should immediately know these three from childhood (and vice versa), but for the league, a significant amount of time has passed in the Feywild and thus they have aged beyond recognition (and the party members have faded from the league’s memories)… for now.
- Six goblin knights also line the halls of the throne room (3 on each end). It should hopefully be obviously to your party the dangers of the room, but if they seem as if they are about to pick a fight here it would be worthwhile to try and steer them away from it
- After a short while, Gark will notice his new visitors – the party. He will tell the league members that he will think on it and they should relax elsewhere within the keep for now as he has other business to attend to. While annoyed, the Kelek, Zarak, and Warduke will leave – passing right by the party as they exit but without interest. At this point have your players make a DC 16 Insight or History check to see if they recognize the three.
- Alternatively (or additionally), you could have Kelek whisper to his companions “That pathetic goblin will rue not respecting the league of malevolence” as they pass by which should likely spark memories in your players.
- If you’ve been using a certain theme song as recommended for the League you can also play at this point which should definitely trigger memories
- If the players try to engage them in conversation they will ignore any such efforts. Feel free to have Kelek teleport themselves away if the players are particularly insistent
- If the party has already rescued Strongheart and brought him with them, the League members will demand to Gark that Strongheart be turned over to them before they exit. Gark will refuse, reiterating his perspective that he will think on it first. The league will not push the issue though, as they are greatly outnumbered in the chamber.
- If Strongheart is here and retrieved his equipment, he is able to close his helmet visor to hide his identity
- If asked afterwards, Strongheart will have a vague recollection of the league as a group of evil-doers
- Once the League of Malevolence has left, the goblin king will summon the party to the dais to see why they’ve come. If Strongheart is with them, Gark will be more wary than he would otherwise as it means the party has either defeated a large number of his subjects or somehow broke inside.

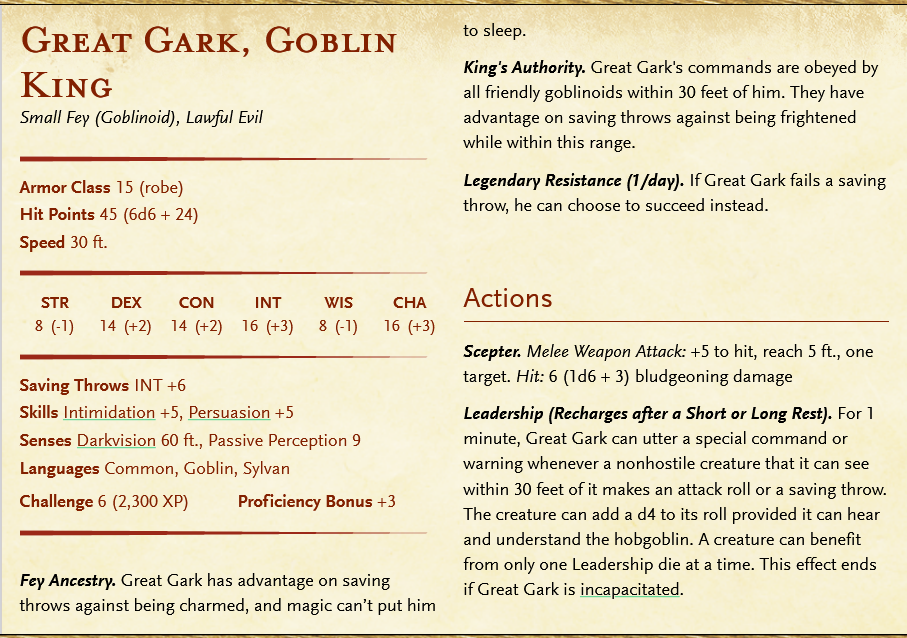
Meeting with Great Gark, the Goblin King
As a reminder, Gark’s overarching goal is to conquer the rest of the Fields of Spring, including Vale Crossing. He seeks to accomplish this by supplementing his army with Skabatha’s tin soliders and magical weapons crafted from the lumber of The Shroudwood.
Gark is a vain creature with a puffed up view of himself and his power. Since he took over the Green Keep ten years ago he has been essentially unchallenged with Oberon being gone which has only made his own view of himself continue to inflate. Even so, he has only recently started his plans to conquer the rest of the land as he has been wary of Oberon potentially returning. No one knows where he went after all.
Given this:
- If the party has come to convince him to stop his logging camp operations, he would be looking for something of at least equal value to aid his war efforts.
- If they have come to free Strongheart, he has no personal stake in keeping the leader of Valor’s Call. However he now knows the warrior is of value due to The League and won’t let him go cheaply.
If the characters turn to violence, a thorough beating of Gark and his compatriots will convince him of the party’s point of view on these topics. Winning such a battle may be a challenge though, especially if the party is already injured or depleted of resources.
L16. Old Treasury
You imagine once this chamber must have been a great treasury filled with coins, jewelry, and other precious goods. It now lays bare of any such goods – perhaps spent or squandered, and has now been re-purposed into an armory of sorts. Racks of weapons line the walls filled with simple weapons, suits of armor, shields, and the like.
The majority of the weapons and armaments here are tailored towards goblins, and thus will only fit creatures that are of size small. However, there are some additional items to be found that may be of use to the party:
- 1 Black Pudding Power Bombs (see Part 12 for details)
- 1d4 Arrows of Faerie Fire (see Part 10)
- 1d4 Phase Arrows (see below)
- 2 Potions of Greater Healing

Phase Arrow
Weapon (arrow), rare
This arrow seems to flicker, with parts of the shaft shifting from translucent to fully solid. When a phase arrow is fired it flies 90 feet in a straight line. For each creature in the line make a standard attack roll to see if they are struck by the phase arrow. If the arrow hits a target it deals standard damage plus 1d12 force damage, and then continues onward until its path completes.
Once a phase arrow has been used, it becomes a nonmagical arrow
The treasury is a common haunt for Puck (see the first floor Chapel), who likes to search for different weapons or magical items to aid her in her troublemaking.
Resources
I have highlighted some of the resources I used for this portion of the campaign below.
Art
- Fields of Spring Handout by IndieRex
- Location Handouts | Painting Thither series by tzlynart
- Goblin Tokens by IndieRex (Updated!)
- Green Keep Courtyard | “Castle Courtyard” by AfternoonMaps
- The Green Keep Map | “Iron Keep” by Morvold Press
- Green Keep Throne Room Map | “Elven Throne Room” by DnDavid.
Music
- Fields of Spring and Golden Fields Background Music
- Amongst the Trees by Travis Savoie
- Beyond The Witchlight: Shifting Magic by MAB Music TTRPG
- Location Specific Music
- Green Keep | “The Mordrem” from Guild Wars 2
- Meeting Great Gark the Goblin King | “The King of Thieves” by Travis Savoie
- Combat Music
- Goblin Combat A | “Quirky Deadly Critters” from Dungeonland
- Goblin Combat B | “Minion Theme” from Overlord 2
—
What’s Next?
With the Green Keep out of the way we have finished our journey in the Fields of Spring. It’s now time to venture north into Yon – the realm of the unseelie fey and Queen Mab.
As always, please don’t hesitate to reach out with any comments, questions, or suggestions and… see you in the Feywild!

Hello! Just wanted to give my appreciation of your guides. These help me SO much to plan games when I don’t have much time due to work and life struggles. These are so creative and thorough. Never stop writing dude you are amazing!!!
Thank you so much! Glad you’re enjoying them and feel you on work / life (or otherwise I’d have this series finished already 🙂 !)
hi! Do you have a full picture of Jelly Bear?
Here you go!
Thank you, it’s even more horrifying than I pictured
I generated some images of the Green Keep’s Rooms. I’ll leave the link to the gallery here, in case someone else finds an use for them. I really liked how the Throne Room picture came out with the League of Malevolence. https://imgur.com/gallery/green-keep-dY5fKLO
These are very cool – really brings the Green Keep to life!